M a n u a L
Assembling your button cleat

Tips.
* Practice assembling the button cleat
at a table.
* Place a towel on deck while mounting it
to the shroud, thus reducing the risk
of parts accidentally bouncing overboard.
* Turn one of the saddles if they don't fit
easily into the slit bolts.
Take your time, you only have to do it once.
Maintenance: Rinse with fresh water.
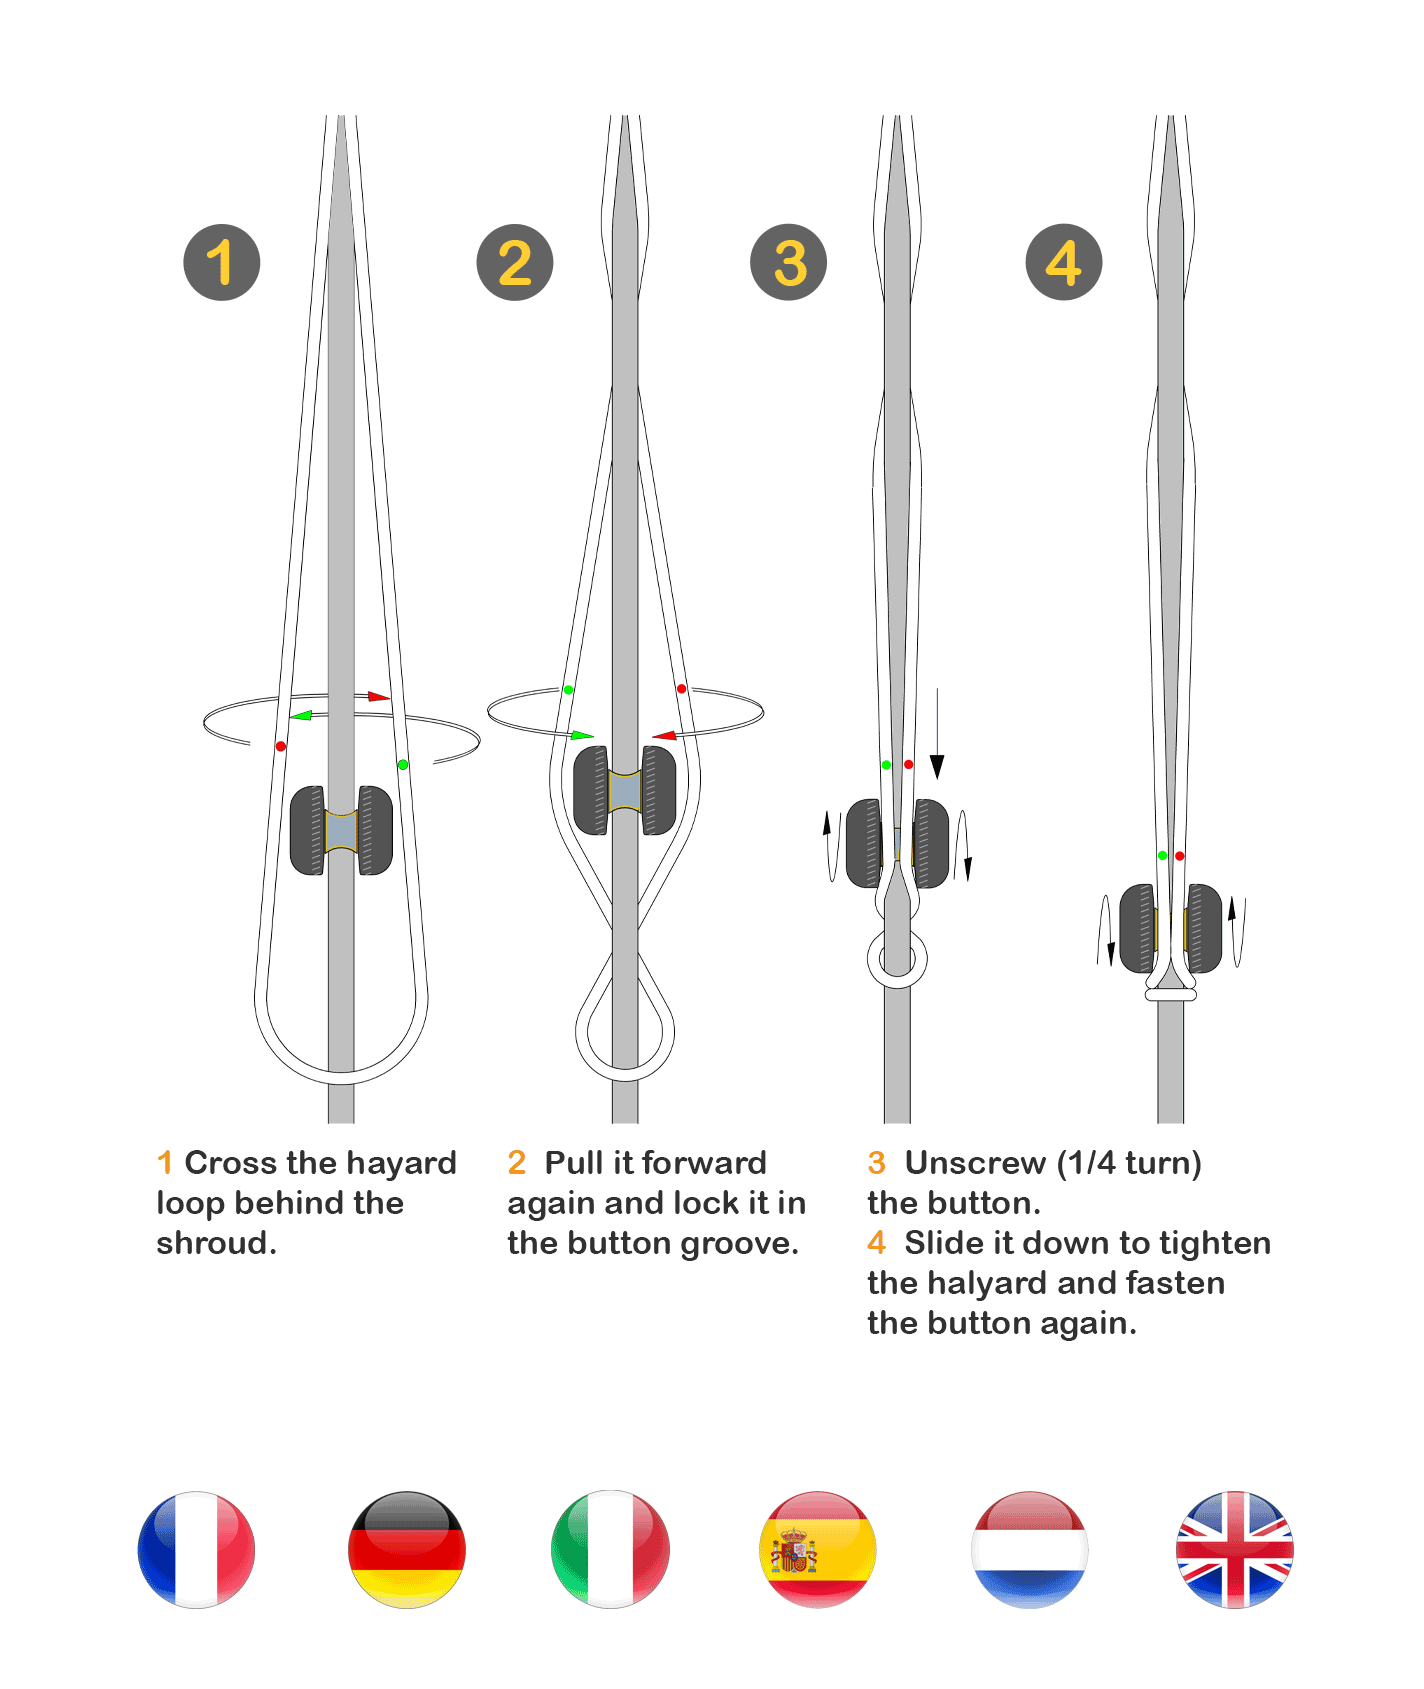
BELAYing
YOUR flag halyard
DEFINE THE LENGTH OF
YOUR FLAG HALYARD
YOUR FLAG HALYARD
* At the (aft) lower diagonal schroud,
set the positioning hitch to center
your halyard (without flag) between
the mast and the cap shroud
See picture below.
This way you prevent the flag from
hitting the shroud or mast and wearing
it out. Plus making an annoying sound
when you are below.

* Set the Button cleat not less than
8" (20 cm.) below the hitch.
* Finally adjust your halyard length,
without flag, to make it fit
around the Button Shroud Cleat.
* Do not skip the positioning half hitch.
Preferably use 1/8” (3mm.) braided
polyester flag halyard rope.

Your flag halyard belayed tidily.
Clamps firmly and secure
yet easily adjustable.
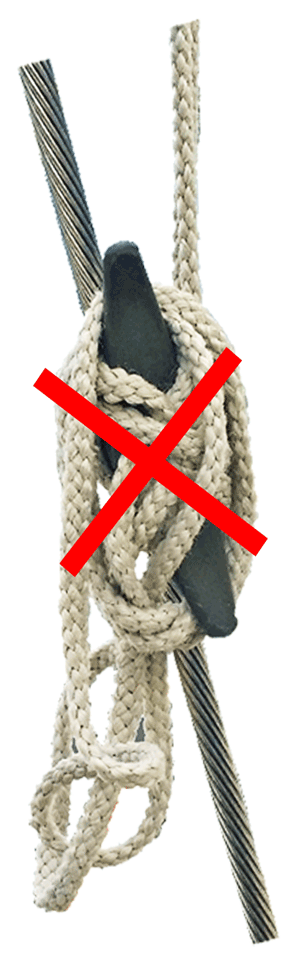
No more spaghetti halyards
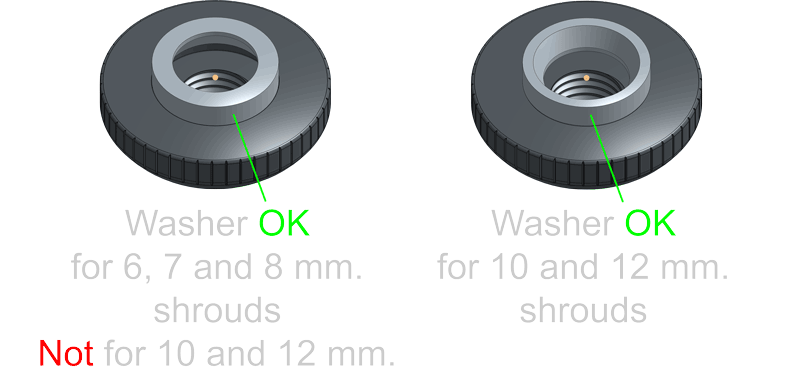
| 5 shroud size versions: |
Fsn-D10
Fsn-D8
Fsn-D7
Fsn-D6
for 10 mm. (13/32")shrouds
for 8 mm. (5/16") shrouds
for 7 mm. (9/32" and 1/4") shrouds
for 6 mm. shrouds
For more shroud diameters, please contact.
This pay button redirects to our Shopify check out page.
International patents pending
Rally & Regatta EU division
The Netherlands
info@rallyandregatta.com